
Integrate NDepend with TFS 2013
IMPORTANT:
|
Deploy the NDepend TFS plugin
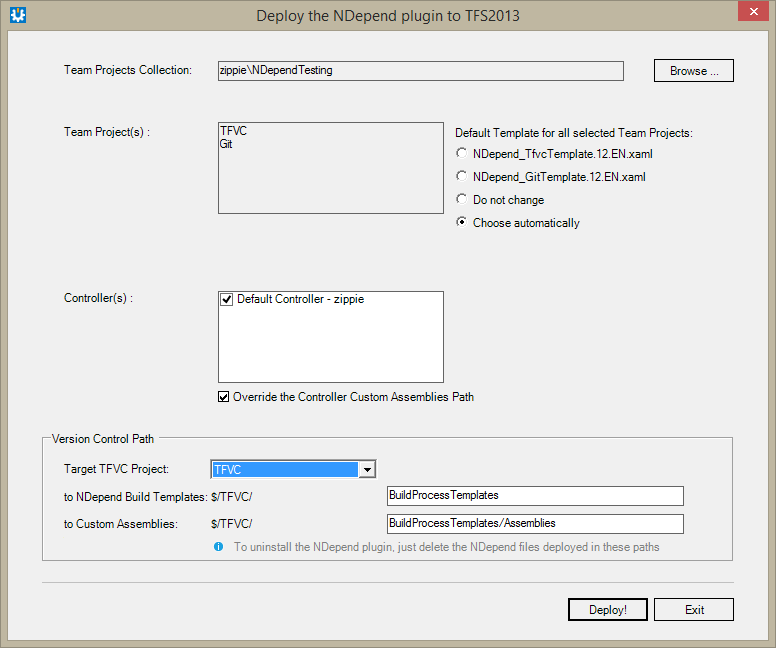
To deploy on TFS version 20XX (TFS2013 supported for now, TFS2015 not supported, TFS2017+ and Azure DevOps supported see more here), in the directory $NDependInstallationDirectory$\Integration\TFS\TFS20XX start the executable NDepend.TFS20XX.Deploy.exe. The UI below is shown. You just need to connect to the Team Projects Collection on which you wish to deploy the NDepend TFS plugin, select the controller(s), and eventually customize the paths where the NDepend assemblies and Build template will be deployed on the server.
Notice that 2 templates are provided, to handle both TFVC (TFS Version Control) and Git scenarios.
| Note: Custom activities for your Build Process Template must be stored in TFVC, they cannot be stored in a Git Repository. You will not be able to deploy if none of the projects you selected use TFVC as source control repository. |
On each TFS Build Agent, you need to unzip the NDepend redistributable files in a defined directory, like C:\NDepend\v6 for example.
- For trial usage, run once VisualNDepend.exe to start your trial period on the machine.
- For pro usage, make sure to install the NDepend files with the build machine license file.
CAUTION: You must make sure that the NDepend version installed on the build machine is the same version than the one deployed through NDepend.TFS20XX.Deploy.exe. Else it won't work. To check the version of an assembly you can for example, hover with the mouse the assembly in the Windows Explorer, and wait until a tooltip appears, that shows the assembly version.
Integrate the NDepend analysis into your TFS Build Definition
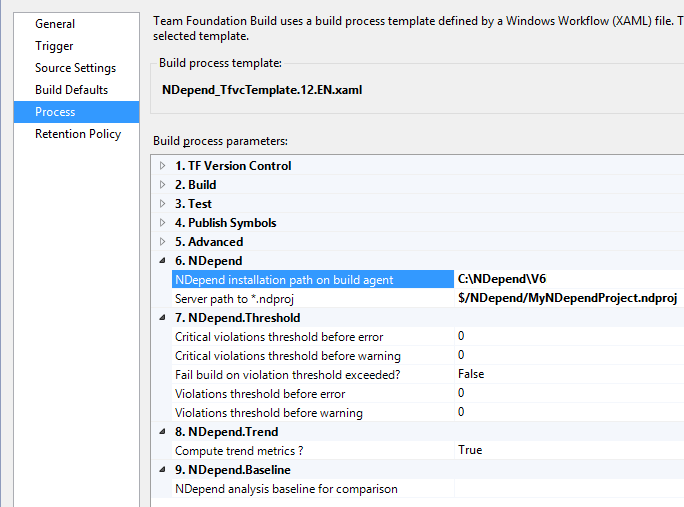
To get started, use the NDepend build template (here NDepend_TfvcTemplate.12.EN.xaml same procedure applies for the Git template). In the Build Process definition window, in the Process tab, there are several sections concerning the NDepend plugin.
Note: The default configuration of the template assumes that you will build one Configuration and that you will be using the SingleFolder option for the Output Location.
NDepend works best when your build is configured to generate full debug information, as such we recommend you select the "Debug" configuration to build.
To load assemblies from a specific folder, edit the NDepend Assemblies Folder item. It supports wildcards (?, *, **) similarly to the way test assemblies are defined.
Examples:
|
- Assign the absolute path to the directory where NDepend is installed on the machine (see previous section) to the field NDepend installation path on build agent. Notice that if this field value gets changed, the Visual Studio Team Foundation Build Service Host 2013 windows service will need to be restarted in order to take effect. This is because NDepend assemblies are then already loaded in memory and this value is not read until the build service gets restarted.
- Assign the server file path (starting with "$/" for TFVC and "\" for Git) of the NDepend project file (extension .ndproj), to the field Server path to .ndproj.
Set the various thresholds concerning rules (and critical rules) number of violations, to emit a build warning or error upon NDepend rules execution result.
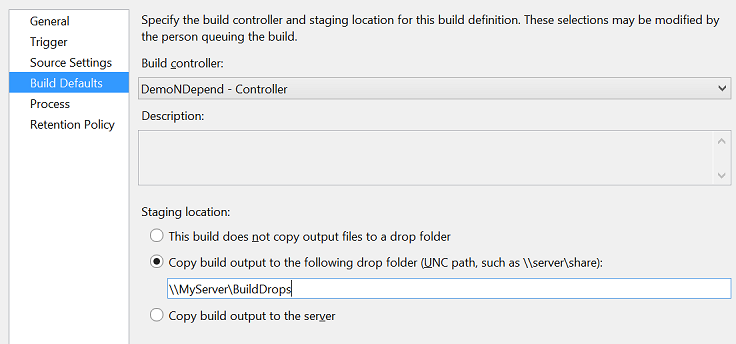
Make sure to use the option Build Defaults > copy build output to specified drop folder (UNC path). Doing so will make the report link work from both:
- the Build Summary Window (in Visual Studio), section NDepend Analyze Results, line To consult NDepend report click here. (see section Build Summary and Logs)
- and from from the TFS Web Access (see section Web Access Extension)
Define the Baseline for Comparison
If you want to use the Diff features of NDepend (including rules on diff, or filter recent violations only) you can assign a past TFS Build to the field NDepend analysis baseline for comparison. Once the baseline build is selected, a message box will propose to flag the selected build as Retain Indefinitely to avoid this build being deleted according to retention policies. This would obviously break the NDepend baseline.

NDepend Custom Activities
The assemblies NDepend.TFS20XX.Activities.dll comes with several custom TFS build process activities. These activities are used by the NDepend build template.
The architecture of multiple custom activities chained, will let you customize your own Build template usage of NDepend analysis results.
Customize the Build Template
To visualize or edit a Build template, first consult the reference document Customize your build process template. Then follow this steps:
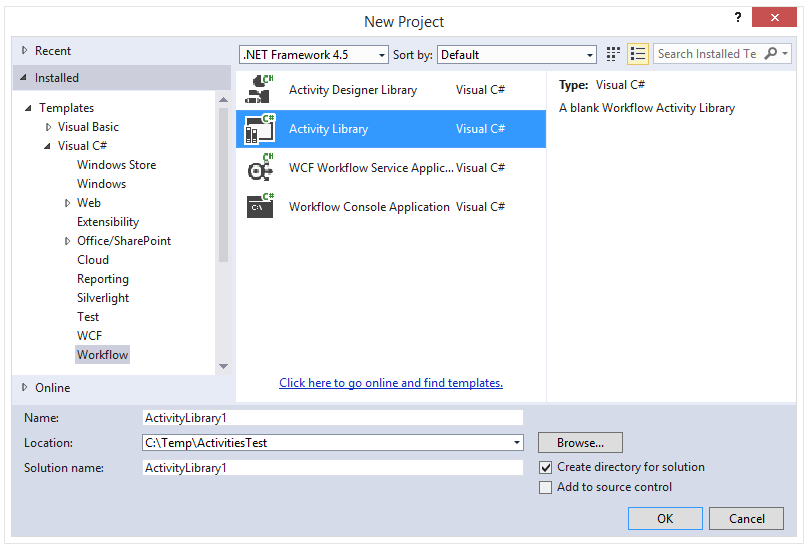
- Open Visual Studio (version same as the template, like VS2013 for NDepend_TfvcTemplate.12.EN.xaml) and create a new Activity Library Project. You can choose C# or VB.NET.
- Add the template Tfvc or Git file to the project. These two template files can be found in $NDependInstallationDirectory$\Integration\TFS\TFS20XX.
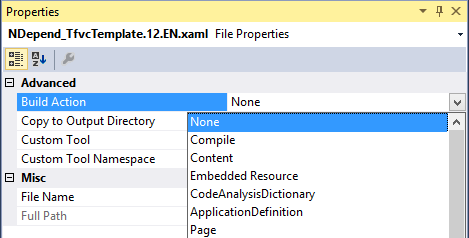
-
Change the template file properties Build Action to None.
-
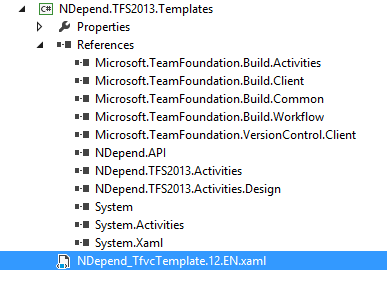
Add references to NDepend.API.dll from $NDependInstallationDirectory$\Lib, and to NDepend.TFS20XX.Activities.dll and NDepend.TFS20XX.Activities.Design.dll from $NDependInstallationDirectory$\Integration\TFS\TFS20XX.
- If you are referencing the Git template, since TFS2013 Update 4, you need to also reference LibGit2Sharp.dll that can be found in %VisualStudio_Install_Path%\Common7\IDE\CommonExtensions\Microsoft\TeamFoundation\Team Explorer\LibGit2Sharp.dll.


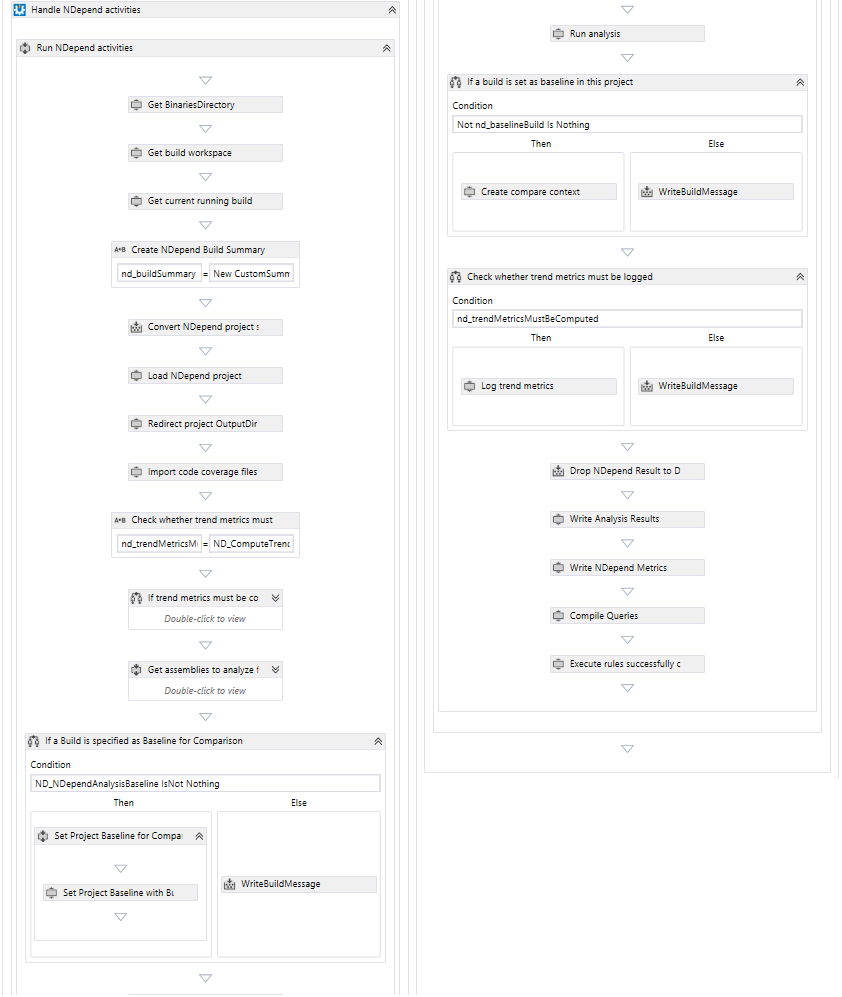
Now, let's focus on some non-trivial details of the NDepend activities.
The $(BinariesDirectory)
A TFS convention is that assemblies built by the TFS build process are output to the $(BinariesDirectory). If we look into the parent activity Get assemblies to analyze, we can see that paths to assemblies to analyze, referenced by the NDepend project, are overridden. This way the NDepend analysis will attempt to find assemblies to analyze in the $(BinariesDirectory).
|
Note: To allow NDepend to load you assemblies from a directory other than the root of the binaries folder on the build agent, you will need to customize this section. |
The way assemblies are resolved can be customized to your need by modifying steps previous Override application assemblies.

Deal with Code coverage files
The NDepend project file typically referenced one or several code coverage files to import at analysis time. This way NDepend is aware of code coverage ratio for each code elements. In a TFS build process, code coverage files can be generated, prior running the NDepend analysis activities.
To make easier to import these code coverage files, the activity ImportCoverageFilesFromDir (in the template box Import code coverage files) has a parameter named CoverageFilesDir whose value is set per default to:
System.IO.Path.Combine(BinariesDirectory, "CoverageFiles")This way your build process just have to copy all coverage files to import in this directory, no matter the coverage technology and the coverage file names.
The coverage files found in the coverage directories will come in addition to coverage files already referenced by the NDepend project (if any).
Log Trend Metrics
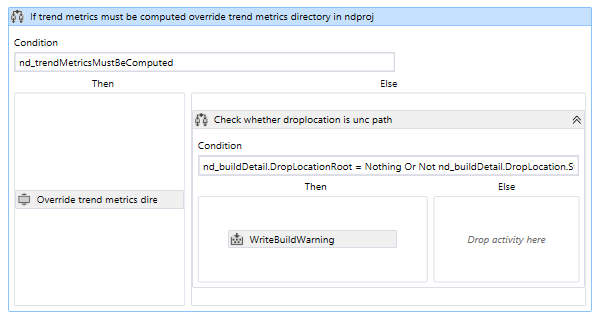
Trend metrics can be logged during each build. To do so, just assign the value true to the field Compute Trend Metrics in the Build Process definition. If this value is set to true in the template box If trend metrics must be computed override trend metrics directory in ndproj the directory where trend metrics are stored in the NDepend project is overridden with the default value:
System.IO.Path.Combine(nd_buildDetail.DropLocationRoot, nd_buildDetail.BuildDefinition.Name, ND_TRENDMETRICS_DIRNAME)If you change this default directory, make sure to not specify a directory inside any Build drop location (else it will be removed once the Build is removed).
Notice that the value specified in the NDepend project concerning log recurrence (like log at most once a day) is not taken account. Trend metrics are logged every time the NDepend activities Log trend metrics is executed.
Build Summary and Logs
The NDepend TFS plugin adds up a section in the summary of the TFS Build. There you'll find key metrics, errors and warnings, and also a link to the NDepend report.

If you click View Log you'll see Build logs. The NDepend TFS plugin appends many logs that detail activities sequential execution details. These logs should help you solve most issues.

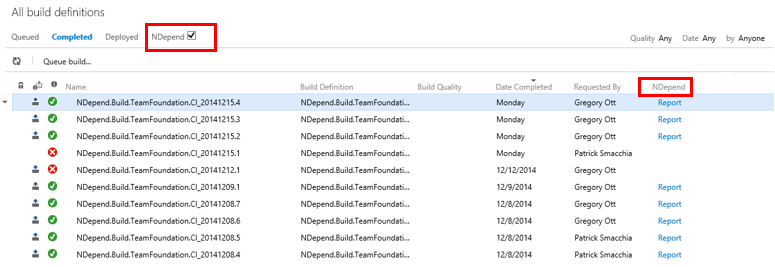
Web Access Extension
A TFS Web Access extension can be installed to decorate builds listed with a link to the NDepend report.
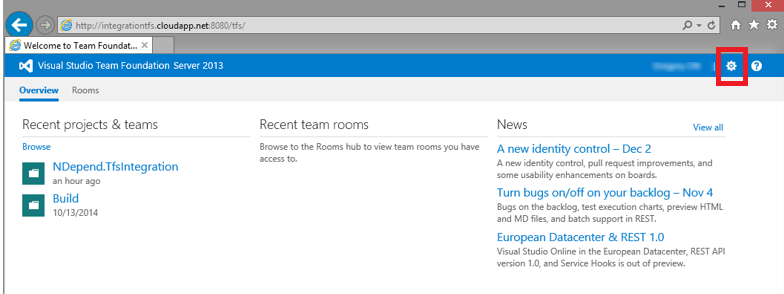
To install this extension, navigate to the TFS Web Access site in your browser. For instance: http://YOURSERVERNAME:8080/tfs. Then click the gear icon to go to settings.
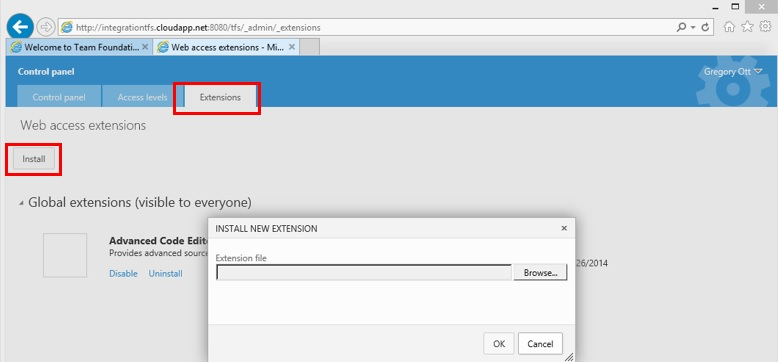
In the Control panel, select the Extensions tab and choose Install. Browse $NDependInstallationDirectory$\Integration\TFS\NDepend.TFS.WebAccessExtension.zip Click OK to upload and install the extension. Don't unzip the file.
Click the Enable button next to the NDepend TFS Extension extension. Then click OK in the dialog prompting you to grant access to the extension.

|
IMPORTANT:
|